Granting access to notifications
The built-in permission system controls whether users are allowed to use notifications or not. The following text explains how you can check and assign the necessary permissions.
Checking the access rights
The following text explains how you can view a user or a user group and check if the user or the group is allowed to access the "notification" module.
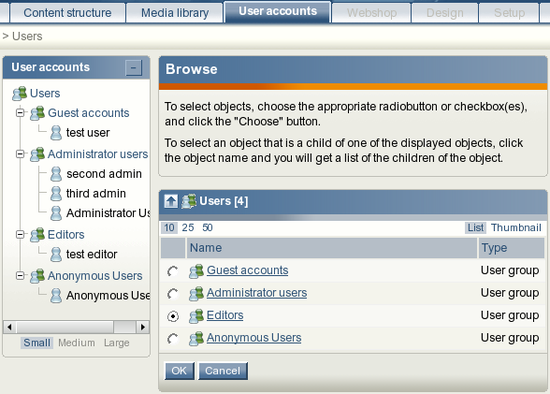
- Log in to the administration interface and click the "User accounts" tab. You should see your users and groups on the left.
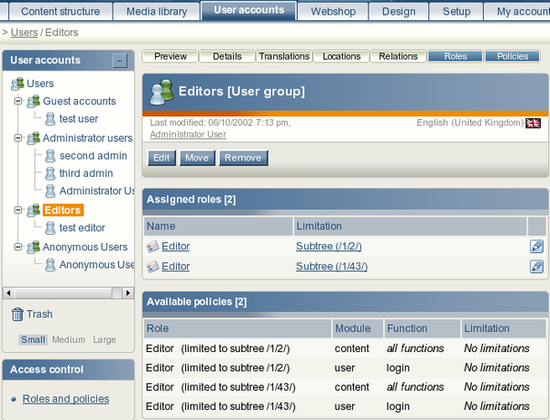
- Select the target user/group using the tree or the "Sub items" window. The screenshot above shows a situation when the "Editors" user group is selected. You can bring up a list of roles and policies assigned to this group by enabling the "Roles" and "Policies" windows using the menu at the top.
- Look at the "Module" column in the table of policies. As long as the "notification" module is not listed here, the selected user/group is not allowed to use notifications. Please refer to the next sections for information about how you can create a new role (that grants access to the module) and assign it to a user/group.
Creating a new role
The following text reveals how you can create a new role for granting access to notifications.
Click the "User accounts" tab in the administration interface and then access the "Roles and policies" link on the left. You should see the list of existing roles as shown in the screenshot below.
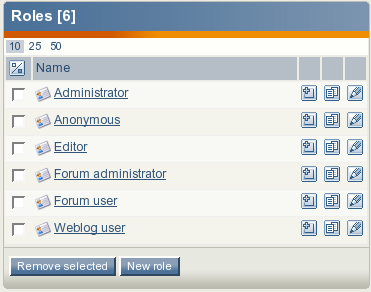
The list of roles.
- Let's create a new role called for example "My notification role". Click the "New role" button under the list of roles. You will be taken to the role edit interface as shown in the following screenshot.
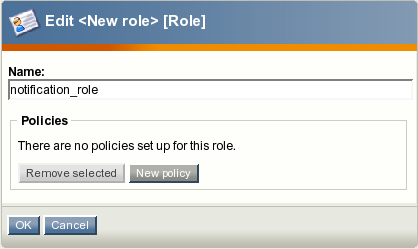
Adding a new role.
- Specify the name of the role and click the "New policy" button.
- The wizard will help you to create a new policy in two steps.The above screenshot shows the first step. Select the "notification" module from the dropdown list and click the "Grant access to one function" button.
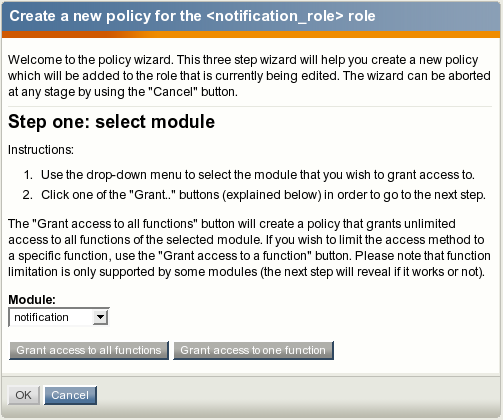
The new policy wizard, step 1.
- You will be taken to the second step as shown in the screenshot below.Choose the "use" function from the dropdown list. Please note that you shouldn't choose the "administrate" function because it grants access to the "runfilter" view of the "notification" module.
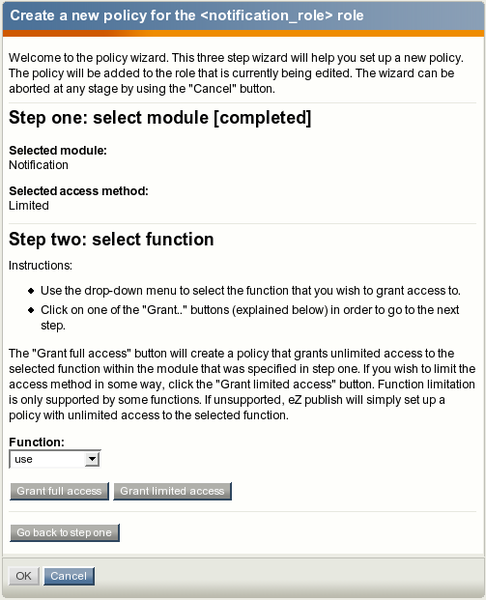
The new policy wizard, step 2.
- Click the "Grant full access" button. (There is no point clicking the "Grant limited access" button because the functions of the "notification" module do not support limitations.)
- The new policy will appear in the role edit interface as shown in the following screenshot.
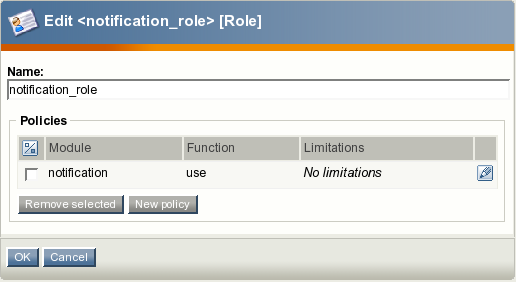
The role edit interface.
- Click "OK" to save your changes and go back the role view interface.The new policy will appear in the role view interface as shown in the screenshot above. You can now assign this role to any user or group (this is explained in the next section).
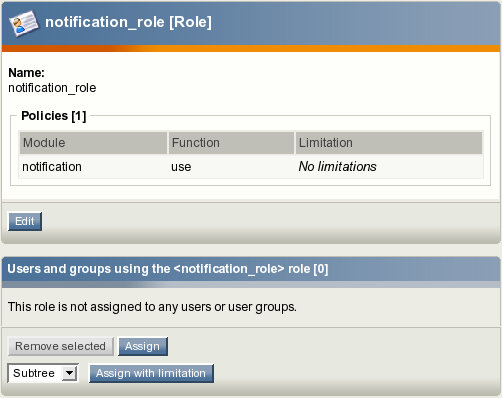
The role view interface.
Assigning a role to a user and/or a user group
A role can be viewed by clicking on its name in the list of existing roles in the role interface (select "Roles and policies" from within the "User accounts" to bring up the role interface).
When you're looking at a role, there should be a list of users/groups towards the bottom of the page. This list reveals the users and groups that the role which is being viewed has been assigned to. The following text explains how to use this list in order to assign the role that is currently being viewed to the "Editors" user group.
- Click the "Assign" button located under the list of users in the role view interface.
- The "Editors" user group will appear in the list of users. The screenshot below shows the role view interface for "My notification role" that is assigned to the "Editors" user group (this means that all users that belong to this group are allowed to use notifications).
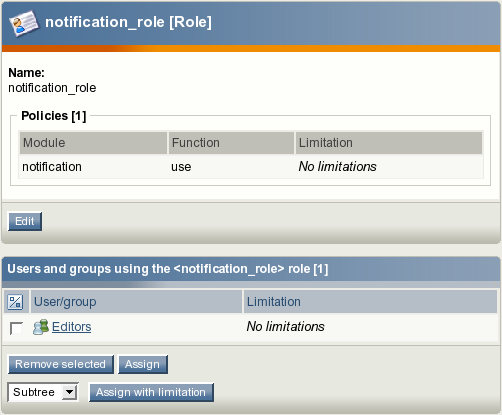
The role view interface.
Please note that you can assign the role to a single user in the same way as to a user group.
Svitlana Shatokhina (10/02/2006 8:29 am)
Balazs Halasy (16/02/2006 9:56 am)

Comments
There are no comments.