Managing the translation languages
The administration interface allows you to manage the translation languages for your site. This can be done by manipulating the global translation list. To access the list of translation languages, click the "Setup" tab in the administration interface and select the "Languages" link on the left. (This interface can also be accessed by requesting "/content/translations" in the URL.)
The following screenshot shows how this list looks like.

The last column of the list contains information about the number of translations i.e. how many content objects are translated into each language. The screenshot shows a situation when all the objects exist in English but they are not translated to French. If you click on a language name, the system will display information about this language and its locale settings.
The next subsections explain how the translation languages can be added and/or removed using this interface.
Adding a new language
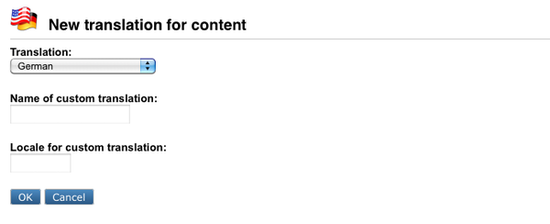
You can add a new translation language by clicking the "Add language" button and selecting the desired language from the drop-down list called "Translation" (look at the next screenshot). Please note that the contents of this list depends on the available locales represented by the INI files in the "share/locale" directory. If you wish to use a language which is not available here then you need to add the missing locale first.

Click "OK" to save your changes. After clearing the caches, you will be able to use this language for your content objects.
Removing a language
You can only remove a language if there are no content objects using it (when the "Translations" column contains "0" for a language).
To remove one or more languages from the system, select the languages that you wish to remove (use the check-boxes located in the first column) and click the "Remove selected" button.
Geir Arne Waaler (30/11/2010 9:51 am)
Geir Arne Waaler (30/11/2010 9:51 am)

Comments
There are no comments.