Creating new packages
The administration interface allows you to export your class definitions, content objects, settings, design styles etc. into packages of different types. This functionality is implemented using the built-in package creation handlers for the following types of packages:
- Content class packages
- Content object packages
- Extension packages
- Site style packages (design packages)
The built-in package creation handlers are stored in the "kernel/classes/packagecreators" directory. Please note that there is no package creation handler for site packages and thus it is not possible to create such packages using the administration interface. The packages created locally are stored under the "Local" system repository.
The next subsections explain how to create packages of different types.
Content class packages
The following example demonstrates how to create a content class package.
- Click the "Setup" tab in the administration interface and access the "Packages" link on the left. You will be taken to the list of packages located under the "Local" system repository. (This interface can also be accessed by requesting "/package/list" in the URL.)
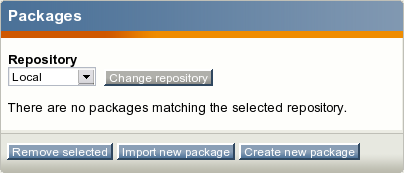
The "Local" system repository is empty.
- Click the "Create new package" button located under the list of packages. The system will bring up the package creation dialog where you can choose between four available package creation wizards. (This interface can also be accessed by requesting "/package/create" in the URL.)Choose the "Content class export" wizard as shown in the screenshot and click the "Create package" button.
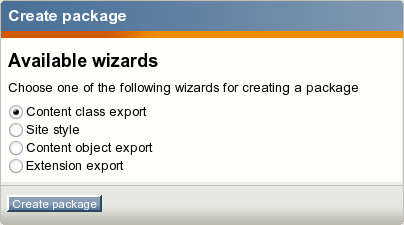
The package creation dialog.
- The package wizard starts from asking what classes to include to the package being created (look at the next screenshot).Select the desired class(es) from the list and click the "Next" button.
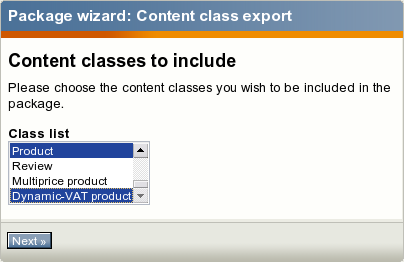
The content class export dialog.
- Now, it's time to enter some information about the content class package. Give it a name and enter some text to describe the package as shown below. Click the "Next" button.
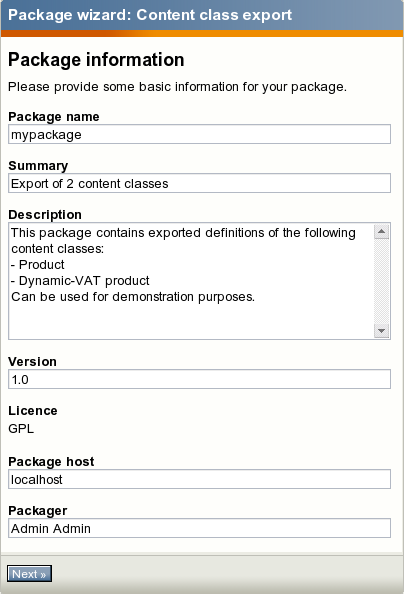
The package creation wizard: package information step.
- The system also needs some information about the package maintainer. Enter this information and click the "Next" button.
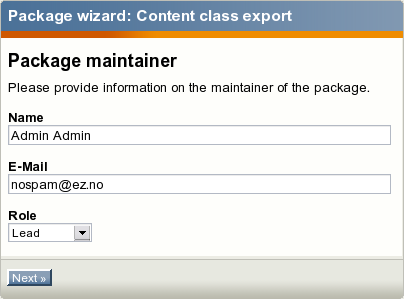
The package creation wizard: information about the package maintainer.
- In the last step, you can optionally enter some information about the changes you applied to this version of the package (look at the next screenshot).After clicking the "Continue" button the wizard will create the package and display its summary.
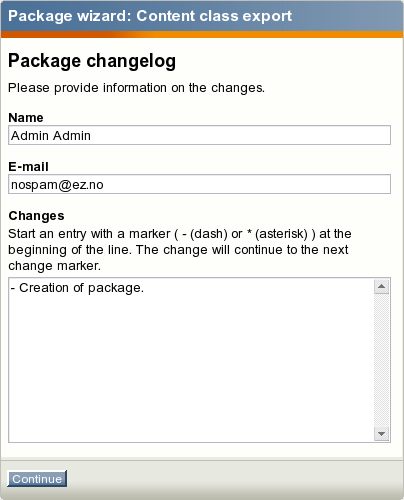
The package creation wizard: changelog.
Content object packages
The following example demonstrates how to create a content object package.
- Click the "Setup" tab in the administration interface, select the "Packages" link on the left and access the "Create new package" button located under the list of packages. In the package creation dialog choose the "Content object export" wizard as shown in the screenshot below and click the "Create package" button.
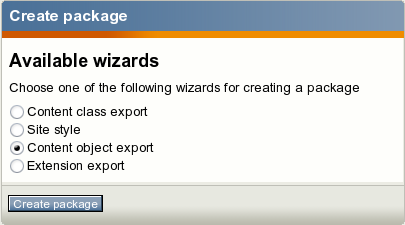
The package creation dialog.
- The package wizard starts from asking which objects to include to the package being created (look at the next screenshot).The following text describes how you can use the "Add node", "Add subtree" and "Remove selected" buttons for choosing the desired objects.
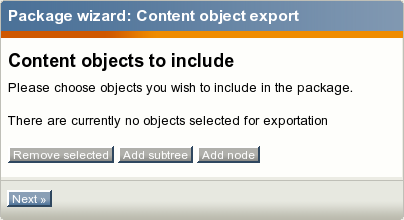
The content object export dialog (no objects selected).
- The "Add node" button makes it possible to add individual objects to the package which is being created. When you click this button, you will see a dialog called "Choose node for export". This dialog will display the nodes that are located inside the "Content structure" tree. Use the list to select the nodes (which encapsulate the objects) that you want to include in the package. The following screenshot shows this dialog where the node which encapsulates an article node called "New article" is selected.Please note that it is possible to select multiple nodes/objects at the same time. You can navigate the list by clicking on the names of the nodes. If the desired node is located outside the "Content structure" tree, click the up arrow icon/button until it brings you to the root of the tree. (This operation will allow you to for example switch to the "Media library" tree and select image objects that are located there.) It is possible to reconfigure how the list is displayed. For example, you can set the quantity of objects per page by clicking the "10" / "25" and "50" links. If you wish to browse image objects as thumbnails, simply click the "Thumbnail" button. After selecting the desired node(s) click the "OK" button to save your choice.
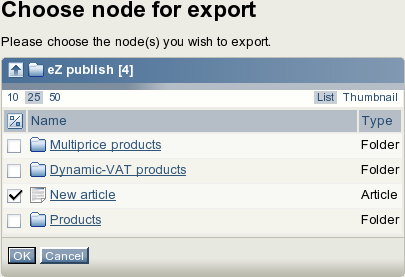
Browse the content tree and select which nodes that will be exported.
- The "Add subtree" button makes it possible to add whole subtrees to the package which is being created. When you click this button, you will see a dialog called "Choose subtree for export". This dialog is very similar to the node choosing dialog described above. The only difference is that selecting a node here means that the whole subtree located under it will be included in the package. Let's select for example a subtree located under one of the folders (look at the next screenshot).After selecting the desired subtree(s), click "OK".
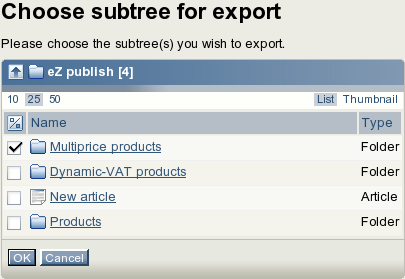
Browse the content tree and select which subtrees that will be exported.
- The wizard will display the selected objects/nodes and subtrees as shown in the following screenshot.If you have mistakenly chosen item(s) that you don't want to be included to the package, use the checkboxes to select these items and click the "Remove selected" button. If everything is correct, click the "Next" button.
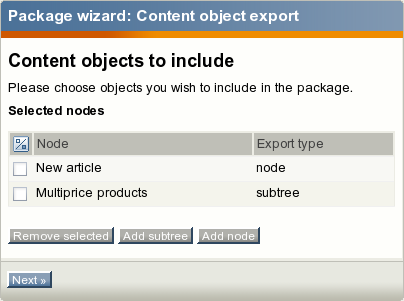
The content object export dialog (one node and one subtree selected).
- In the next dialog you should specify the desired export properties for the objects being added to the package. It is possible to include not only the actual objects but also their class definitions and related templates (the templates can be taken from one or several siteaccesses). The selected objects can be included together with all their versions and languages or you can specify custom parameters. You may choose to keep all node assignments or only main nodes for the objects being imported and specify what to do with related objects. The following screenshot shows how this dialog looks like.Choose the desired properties and click the "Next" button.
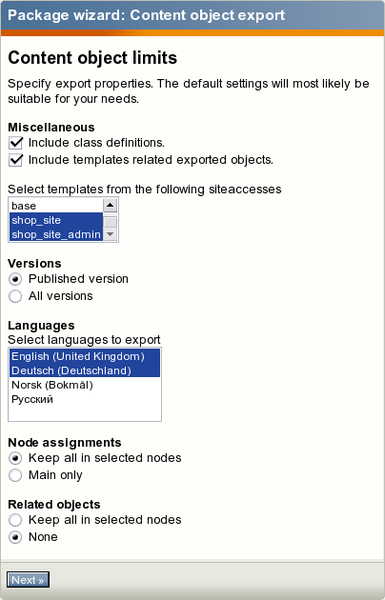
The content object package creation wizard: export properties for content objects.
- The rest three steps of the "Content object export" wizard allow you to enter information about the package itself, its maintainer and changes made in the current version. These are already described above for "Content class export" wizard.
Extension packages
The following example demonstrates how to create an extension package.
- Go to "Setup - Packages" in the administration interface and click the "Create new package" button located under the list of packages. In the package creation dialog choose the "Extension export" wizard and click the "Create package" button.
- The wizard will display the list of existing extensions. Select the extension that you wish to export to the package (as shown in the following screenshot) and click the "Next" button.
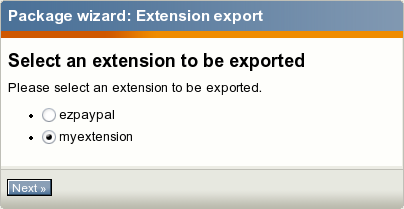
The extension package creation wizard.
- The rest three steps of the "Extension export" wizard allow you to enter information about the package itself, its maintainer and changes made in the current version. These are already described above for "Content class export" wizard.
Design / site style packages
The following example demonstrates how to create a site style package.
- Go to "Setup - Packages" in the administration interface and click the "Create new package" button located under the list of packages. In the package creation dialog choose the "Site style" wizard and click the "Create package" button.
- The wizard will ask you for a thumbnail image, which should be a screenshot or an icon that depicts the look and feel of your theme. The image should be 120px wide and 103px high. The following screenshot shows this dialog.Choose the image file and click the "Next" button.
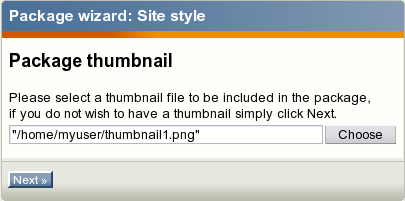
The site style package creation wizard: choose thumbnail.
- The next dialog requests that you provide two CSS files: the "site-colors.css" file containing styles like color codes and background image details for the pagelayout and "classes-colors.css" that determines styles for class templates. Choose these files as shown in the screenshot below (the actual file names do not matter) and click the "Next" button.
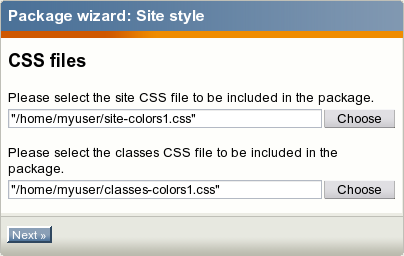
The site style package creation wizard: select CSS files.
- If you use images in your theme, you can upload them in the next screen (look at the screenshot).Click "Next" when you finish adding images.
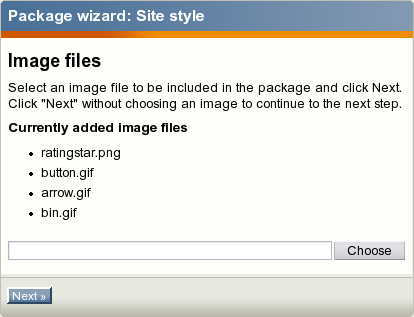
The site style package creation wizard: add images.
- The rest three steps of the "Site style" wizard allow you to enter information about the package itself, its maintainer and changes made in the current version. These are already described above for "Content class export" wizard.
Site packages
It is impossible to create site packages using the administration interface (i.e. there is no package creation handler for these package types). They can only be created manually, which means that a package creator will have to edit the "package.xml" file.
Svitlana Shatokhina (16/06/2006 3:30 pm)
Svitlana Shatokhina (01/12/2006 3:01 pm)

Comments
But where do they come from?
Thursday 11 January 2007 4:12:43 pm
Jochim Lous
Re: But where do they come from?
Tuesday 16 January 2007 9:45:53 am
Svitlana Shatokhina